Wednesday, October 11, 2006

The Scarfing Jig


Here are some pictures of the scarfing jig I used to cut the paddle blanks. The 2x4 is ripped with a 10 degree angle and mounted to the plywood board at a 7.5:1 taper. I saved the fall off to set in the jig to support the blank. The right hand edge runs against the table saw fence. I didn't bother making a slider to fit in the mitre slot. Now imagine the table saw is cleared off and I can move the fence over so the blade runs along the left hand edge of the plywood. The blade is set at 90 degrees for the cut. Other than that, it's been awhile since I used it so all I can say is to follow Nick's directions to the letter and it will work out. I do remember clamping the blank to the board and dry running the operation without the saw turned on to make sure I didn't hurt myself.

Saturday, March 11, 2006

It's a Paddle


Here is the paddle with most of the shaping complete. The shafts have been rounded and the blades are shaped. All that is left is some finish sanding and to finish it. I have decided to put a layer of glass on the front and back of the paddle blade. I'm not comfortable with the purple heart's strength accross the grain.

The paddle is a little under 3 pounds now. It is a little on the heavy side. I may try to knock off a few more ounces before the finish. I'm very happy with the outcome so far. I can't wait to build a Kayak around it.


Here are some more details of the blade shaping. The transition between the blade and the shaft took a little time to make it look alright. Just a little more shaping and then it is out in the sun to darken the mahogony. I think I will keep working the rib down and make the edges a little more sleek.


Shaping the Paddle


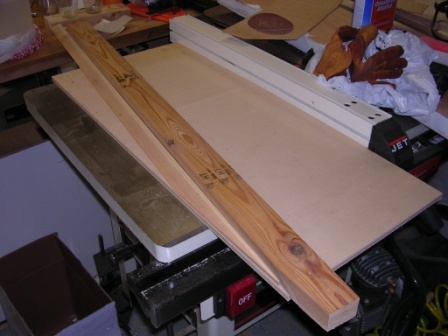
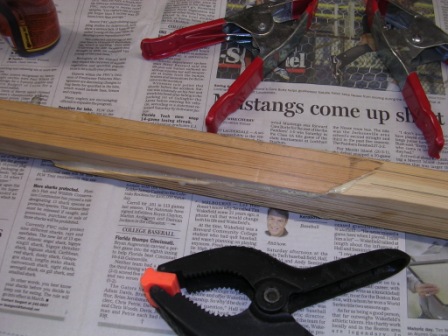
So here is the rough paddle. Everything is glued up, now all that remains is shaping the paddle and finishing it. The picture gives a good look at the feathering of the shaft.

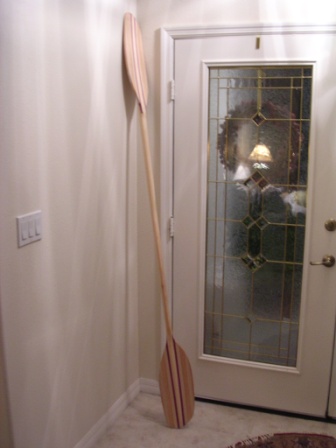
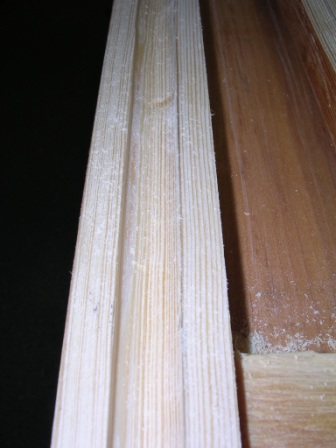
Here, I am begining to turn the square shaft into a round one. Actually, the shafts will end up slightly oval. Before cutting the scarfs, I marked two lines on each face. The process is to knock off the corners down to these lines to make an octogon. You then knock of those corners to make 16 facets...and so on. Eventually, you get to a point where you can easily finish the rounding with sand paper.

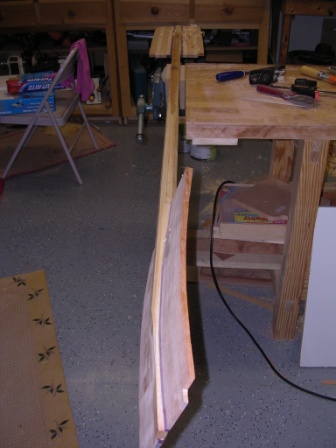
To eliminate all the funky-ness near the scarfs, it is necessary to reduce the diameter a little more than the rest of the shaft. This is hardly noticable and shouldn't affect the performance of the paddle.

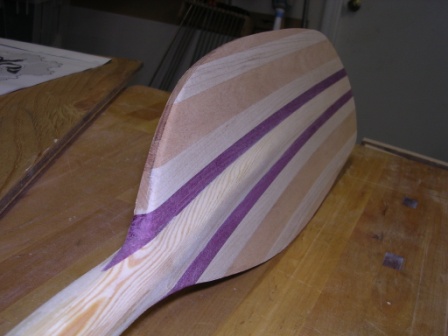
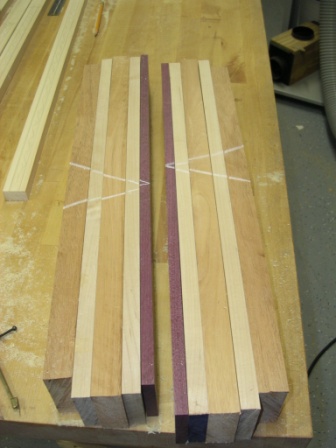
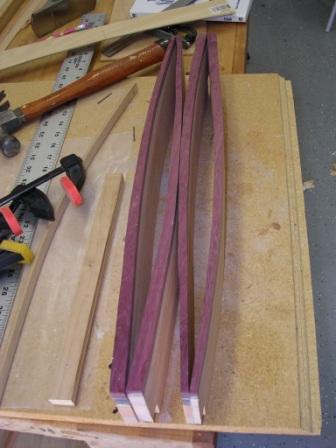
You can also see the beginning of the paddle shaping. The back ridge is pretty much formed. The bottom picture shows the blending a little better. This shaping was done with a right angle grinder fitted with a 36 grit conical attachment that you can pick up in the abrasives section of most of the big name stores.

Shaping is a scary process. Slow and easy is the only way to approach it. The different wood species react very differently to the sanding. The purple heart and maple can take a little while to get through, but the mahogony is extremely fragile. It was a learning experience to try to cut the hard wood aggressively while not butchering the softer mahogony. But if I can do it, anyone can. Eventually, I gained quite a bit of confidence in what I was doing and was able to go pretty quick without damage.

After using the RA grinder, I did some final blending with a ROS and 50 and 80 grit paper. Also, I cut the outline to shape using the offsets in Nick's book.

Here is a picture of my first "war wound". Let's just say exfoliating with 36 grit sand paper at 1700 rpm is not a great idea.

Gluing up the Blades

Here is a shot of the blade blanks clamped to the shaft. You can see that I did a little shaping of the shaft to put in a slight curve. I left it a bit proud so I could shape a slight ridge that tapers from the tip to the transition point. You can see there is a high point about 3 to 4 inches from the transition point. The ridge will taper down from here to the tip where it will be blended in with the blades.
To mark the curve, I used the same template as i used for the blades. I then cut a kerf at the deepest point. I again used the draw knive to rough the curve. I started at each end and cut to the kerf in the middle so I would not be cutting "uphill" against the grain. I then used a spoke shave to smooth it and cut to the line.


Here is the backside after I glued it up. Things are starting to take shape now...kinda looks like a paddle.

At this point, the paddle weighs about 4 1/2 pounds...YIKES!

Tapering the Shaft

After gluing up the shaft, I tapered the ends on the glue faces for the paddle blades. To cut the taper, I created lines that run from about 21 inches from the end to the end. the taper is full width at the 21 inch mark and narrows to around .75 inches at the ends, taking an equal amount off of each side. I then used a draw knife to rough the cuts and a jack plane to cut to the line. This part was fun and only took 15 minutes for all the tapers.

Notice Nick's book on the work bench.

Making the Scarf

At this point, you gotta have a little faith that this is all going to work out. I built a scarfing jig, pretty much following Nick Schade's instructions in his book. I ripped a straight 2x scrap at a 10 degree angle. I then mounted it to a piece of plywood at an angle. I used about a 7.5 to 1 ratio to create the angle to the blade. I mounted the board so that the angled face tilted the workpiece toward the blade. I then mounted the cuttoff from the ripping operation to form a right angle for the work piece to sit on. I haven't taken pictures of the jig yet, but I will soon and post them. These instructions are for a right hand feather. If you are left handed, you need to do things in a mirror image.


The only deviation from Nick's instructions is that I didn't put the runner on the bottom to run in the miter slot. I just ran the board up against the fence and it worked fine. The table saw blade is vertical for this cut. The jig provides all the angles. Make sure you scarf the end with the hollow, or you will have to start over. Also, if your shaft blank is rectangular as opposed to square, you need to make sure that one blank is cut with the long axis vertical, and one with the long axis horizontal. This ensures that the ovals will line up correctly in the final shaft.

I did multiple dry runs before gluing up. There is not much to reference and the angles look very, very strange, but it works. The main thing is to make sure it is straight. The double lines that I drew on before scarfing helped. They will be used later as a guide for rounding the shaft.


Here is another shot to show the strange angles.

Making the Shaft blank


I had a Southern Yellow Pine 2x6 left over that I used for the paddle shaft. For a piece dimensional lumber, it was fairly decent. It has very straight grain and tight growth rings. The only draw backs are its weight and workability. Dark grain is significantly harder than the light and presents some problems when sanding and planing. Some times the grain rings will detach and splinter, especially where the grain runs out of the surface. Still, it looks nice and so far I have been able to mitigate the problems.

Nick Schade recommends splitting the shaft blank and flipping end for end prior to glue up. At the same time, it is easy to use a 1/2" cove bit to create a hollow in the center to reduce weight. The cove stops short of where the blade is mounted so that the core is not exposed during blade shaping.

The yellow pine I am using for the shaft is fairly dense, even though it has been sitting in my garage for several years and should be very dry. When I cut it, the smell of pitch is pretty strong, so I guess that is where the weight is coming from.

The picture shows the hollow created with the cove bit. Before I glued it up, I coated the inside with epoxy. When the two halves are brought together, a perfect cylinder is formed. I used Gorrilla Glue for all the glueups. You can kinda see the squeeze out. So far, I've been very happy with how it bonds.


Making the Blade Blanks

Here is the layout of the blades. The two stacks should be enough for at least 2 paddles. The wood species are, from center out, Purple Heart, Maple, Mahogony,maple, mahogony.

The Maple and Purple Heart are fairly dense, which is going to yield a heavier paddle. But, they look good, so I'm happy with the choices.


Here are the blades after cutting them out on the bandsaw. My template curve wasn't very symmetric which caused problems later during shaping.

Here is a view of the Blade faces. This is a good preview of how the paddle is going to look. Once the final shaping is complete and just before the finish goes on, I am going to soak it in the sun for several days to darken the Mahogony